
Introduction
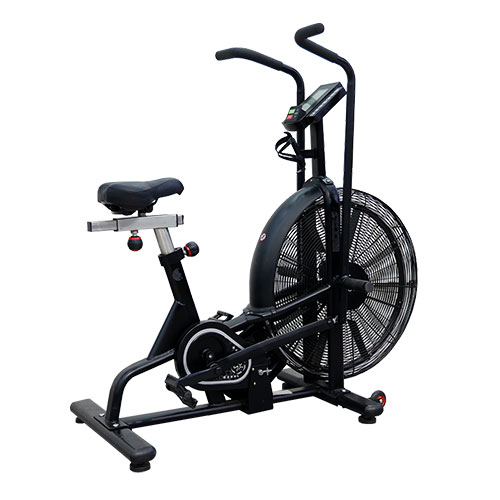
Airbikes, also known as fan bikes or assault bikes, have become an incredibly popular piece of exercise equipment in gyms and homes over the past few years. Resembling a classic spin bike combined with a manual fan, airbikes provide an intense full-body workout that trains cardiovascular endurance, muscle strength, and mental toughness.
Unlike spin bikes or treadmills that isolate muscle groups, airbikes engage both the upper and lower body in a synchronized motion that simulates real-life movement. The fan resistance system also replicates variables that you experience outdoors like hills, wind, and different terrains. This makes airbikes one of the most efficient and effective cardio machines available.
However, airbikes require skill and practice to use properly. Mastering workouts with an airbike takes time, patience, and the right guidance. This blog will take you from beginner to pro, covering everything you need to know to fully utilize airbikes for fitness.
Choosing the Right Airbikes
With airbikes growing in popularity, more and more brands and models are available on the market. Prices range from a few hundred dollars for basic machines to a few thousand for commercial-grade models built for gyms and studios. Here are the main factors to consider when selecting an airbike:
| Feature | What to Look For |
|---|---|
| Resistance System | Fan or magnetic |
| Weight Capacity | 250-350 lbs or higher |
| Adjustability | Multi-grip handlebars, adjustable seat |
| Size/Footprint | Space available in your workout area |
| Price | Budget and intended frequency of use |
Try out different brands and styles to find your perfect match!
Getting Set Up
Properly setting up your airbike will ensure maximum comfort, performance, and safety:
- Seat Height: Adjust so there is a slight bend in your knee at the bottom of each pedal revolution.
- Handlebar Height/Position: Adjust so you don’t have to overreach. Gripping the middle of the handles gives you moderate arm engagement.
- Foot Strap Tension: Secure feet firmly so they don’t slip off the pedals during intense intervals.
- Add Padding: Use gel seat covers, handlebar tape, and padded shorts to prevent chafing and discomfort during longer workouts.
It takes some trial and error to dial in your perfect airbike riding position. Don’t be afraid to make incremental adjustments until it feels right.
Pedaling Technique and Cadence
Pedaling efficiently is critical for generating momentum and maintaining speed on an airbike:
- Push/Pull Technique: Drive strongly with your legs on the downstroke while simultaneously pulling back powerfully with your arms. Let the handles return forward gently.
- Maintain RPMs: Shoot for a pace of ~60+ RPM for moderate cardio, 80+ RPM for intense efforts. Higher cadence requires more core engagement.
- Control Resistance: Learn to adjust your power output to control resistance levels for hills, intervals, etc.
- Stand Periodically: Periodically standing while pedaling engages new muscle groups in your lower body and core.
Perfecting your pedaling, posture, and breathing technique takes conscious practice so be patient. It will soon become second nature.
Programming Your Workouts
Airbikes accommodate virtually endless programming options thanks to the simplicity of operation combined with intense resistance:
| Workout Goal | Sample Workout Structure |
|---|---|
| Steady-State Cardio | 20-60 min moderate effort – Hill intervals: 30 sec hard / 90 sec easy |
| HIIT | Tabata: 20 sec max effort / 10 sec rest x 8 |
| Muscular Endurance | 3-5 sets x 1-5 min hard efforts |
| Max-Effort Testing | AMRAP: As many calories/distance possible in 5-10 min |
Use heart rate data, rate of perceived exertion (RPE) on a 1-10 scale, and personal preference to guide your training. Take regular breaks as needed when intensity is high.
Preventing Injury
While extremely efficient, airbikes also pose a higher injury risk compared to other cardio modalities if not used properly:
- Warm up: Spend at least 5-10 minutes slowly ramping up heart rate and breathing rate before intense efforts.
- Listen to Your Body: Pay attention to signs of excess fatigue like soreness, improper form, and sharp pains.
- Engage Your Core: Brace abdominals to support your spine during seated and standing positions.
- Stretch Post-Workout: Foam roll and stretch hip flexors, calves, chest, shoulders, forearms.
Building progressive overload gradually is key to avoiding overuse injuries when training with airbikes. Allow proper recovery between intense sessions.
Getting Faster and Going Longer
The best way to improve your airbike performance is simply logging more time in the saddle:
- Increase Weekly Volume: Add 5-10 minutes per workout each week to improve cardiovascular endurance.
- Climb “Virtual” Hills: Mentally prepare for a hill or course by visualizing the terrain and strategizing effort.
- Train with Partners: Join friends for some healthy competition doing intervals, sprints, and races.
- Sign Up for Contests: Register for organized events and challenges sponsored by local gyms and studios.
- Track Metrics: Compare data like distance, calories burned, power output over time to quantify progress.
Setting new PRs and pushing your limits is readily achievable with airbikes. Consistency pays off!
Conclusion
While physically and mentally demanding, airbikes provide one of the best full-body cardio and muscle-strengthening workouts you can get. Mastering proper form, technique, program design, and injury prevention is essential to maximize benefits and performance. Commit to 3-5 weekly sessions with incremental progressions and you will be blowing away PRs in no time on your way to becoming an airbike pro!
FAQ
Here are answers to some frequently asked questions about mastering workouts on airbikes:
Q: Are airbikes a good workout for beginners?
A: Yes, but with caution. Start slowly and gradually increase duration and intensity. Focus on good form first before adding resistance.
Q: What muscles do airbikes work?
A: Airbikes engage nearly every major muscle group including quads, hamstrings, glutes, chest, back, shoulders, biceps, triceps, and core.
Q: How often should you train on an airbike?
A: 1-3 times per week is recommended depending on your fitness level and whether you supplement with other training. Allow for adequate rest and recovery between intense sessions.
Q: How can I make my airbike workout more challenging?
A: Increase resistance manually, pedal standing up more frequently, add hills/intervals, train towards PR distance or calories goals, and use in high-intensity class settings.